Sunday, April 12, 2015

Digraph Reading Passages - Fluency and Comprehension Notebook

Hi y'all!  I'm Lawren from Teaching is a Royal Adventure. This is my fourth year teaching students with special needs in grades K-5th, and I have loved every second of it.  
I am thrilled to share with you a new series I am working on for Sample Sunday.  

I have been working on a Skill-Based Fluency and Comprehension Notebook that focuses on phonic skills, comprehension, fluency, vocabulary, and writing.  We have been using this in class, and I love that my students now have a journal with the phonic skills we are covering in class all in one place.  This resource can be used in guided reading groups, independent work, intervention groups, etc.  My newest packet focuses on Digraphs, and that is what I would like to share with you today.  
Here are a few pictures 
on how we use these passages in our classroom.
You can check out this resource in my TPT store by 
clicking the cover below.  
Thank you for taking the time to read this post!  Hope you have a wonderful Sunday!

Saturday, April 11, 2015

Spelling with 1stgradefireworks

Hi everyone! This is Wendy from 1stgradefireworks!


SPELLING!
I know...those dreaded  not fun words that we tell our kids "You NEED to know these words"..because...you will use  attempt to use,forget to use, want to use, in your reading, writing and of course...FRIDAY SPELLING TEST!  UGH! 
So...how many ways can we HELP our kiddos practice those dreaded spelling words??? 
I teach from a district "provided" curriuclum. What does THAT mean? Basically, it means I am "given" the words my kiddos need to know for the week. In 5 weeks...they will take  "benchmark" test which will include SOME of those words. So...we need to practice ALL of them !
How to make the kids WANT to learn them??
  HOW?? HOW??
I try (attempt ) to do Daily 5. I want a Balanced Literacy classroom where kids can practice ALL aspects of literacy..DAILY! ( I have high hopes for them...and for ME!)
So I encorporate WORD WORK activities in our day..in one way or another. They never know what today's Word Work will be...I don't EVER want to hear a MOAN!
This little "trick" has been used with Spelling words, vocabulary words, grammar words, ELD..really ANYTIME you need kids to read, giggle, and use language with words.
* Disclaimer....I am NOT a FAN of worksheets!
YES..I use them. My district provides them. I use them for mini assessments, partner work, independent practice,
 whole /  small group teaching....
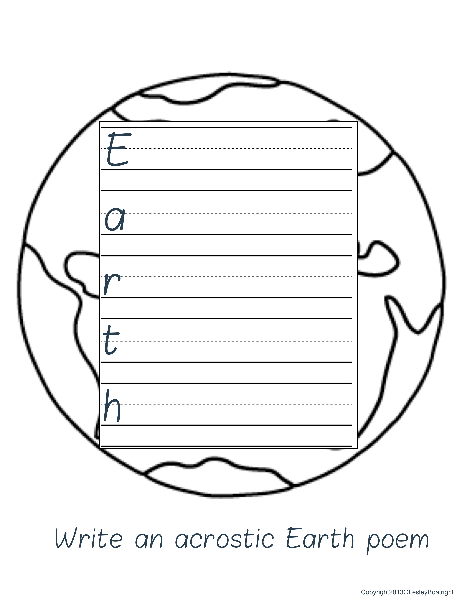
see smaples...

 (Click on picture to see spelling lists)

BUT...
I would rather my kiddos create their own work!
So how to? How to?
I pass out 1 sheet of ...PAPER!
If I only have white paper...I have my kiddos number off...1,2,1,2,1,2,1,etc..
ALL of the 1's...get out a RED crayon!
ALL of the 2's ...get out a BLUE crayon!
Then we fold...yes..FOLD our papers together!
My kids know HORIZONTAL and VERTICAL from DAY 1.
(NO HOT DOG/HAMBURGER...when is anyone ever going to tell them to fold their paper like a hot dog? Tell them to turn their paper horizontal and match the corners!
If we have 8 spelling words...we fold into 8 squares.
10 words..10 squares...16 squares?  And smaller & smaller...
Again...It just depends on your words.
THEN...we ..open up our paper & draw the horizontal & vertical lines!
Next...TOGETHER ( I use my doc camera ) we write ALL of our words..
1 words in a square. Then we ...CUT ON THE LINES!
When we are done ( they get faster at this as the year goes on)..
we will stack up our words...
YES! We are playing the MATCHING GAME..
BUT WAIT!
How do they find a partner?
Remember the two different colors?
Have ALL of the students who used a RED crayon to STAND UP!
Go find a partner who is...SITTING DOWN!
Why? 
When they clean up...you take your RED WORDS & your partner will take his/her BLUE WORDS!
Easy Peasy!
One other way to play is to pass out two colors of "colored paper"..love this for HOLIDAYS!
Same rules apply..Fold, write, cut, & find a partner with a different colored paper!
IF...I have two students left with same color..
SO BE it! Play & I help them sort their words if they can't find their own handwriting!
THEY LOVE THIS!
Easy way to add WORD WORK in an interesting & productive way.
After clean up...TAKE THOSE WORD CARDS HOME TO PRACTICE!
( You sly teacher you...HAHA)
So here's a few pictures of my kiddos in ACTION!
I hope this little tidbit helps you in your quest to find PRODUCTIVE
WORD WORK ACTIVITIES!


I also mainstream 2 Autisitic students daily for Oral Reading Comprehension, phonics pratice, and social skills...they LOVE this game (took awhile to teach "waiting for your turn", and 'turn over 2 cards ..NOT ALL OF THEM' ...but we are making progress!

I hope your kiddos get a chance to..
As MISS FRIZZLE ( MAGIC SCHOOL BUS) would say..

"TAKE CHANCES...MAKE MISTAKES...AND  GET MESSY!"
Enjoy!

Friday, April 10, 2015

Froggy Fun Writivity!

Hi Everyone!
I'm Dee Gentle from Over the MoonBow & I'm sharing my first post with a fun freebie for Freebie Friday! 

A little about me: I have 25 years teaching experience in kindergarten and first grade. I love creating resources to make lessons fun & engaging!

I'm excited to be part of the iTeach First collaborative blog & this awesome group of teacher bloggers. 


Spring is the perfect time for a unit on frogs or just some fun frog stories. Today I'm sharing one of my Writivity resource packs, Froggy Fun. This pack contains everything you need for a quick and easy writing activity. Just copy the one page of pieces to create the frog frame, and the writing form you'd like to use. I've included three choices: informative, narrative, and story structure for reading response. My class will be doing this next week so I didn't have a kid sample, but I put one together to give you the idea.

 
If you'd like a copy, click on the picture below to visit my TeachersPayTeachers store. While you're there, follow me to receive more freebies and updates!

https://www.teacherspayteachers.com/Product/Froggy-Fun-Writivity-Pack-Themed-Writing-Activity-1804894

Have Fun!


Wednesday, April 8, 2015

Digraphs Mega Bundle!

Do you teach digraphs to your kiddos?  If you do, you NEED this huge bundle of digraph resources to help your students learn digraphs.  It's got everything, from small group work

 to centers
find the hidden word pages make great centers.  Before laminating the picture, cut off the bottom  recording sheet.  You can copy two recording sheets per 8.5x11 sheet of paper to put at the center with the laminated picture and a few magnifying glasses.  Kids LOVE using the magnifying glasses to play "word detectives."

to assessments  and/or interactive components!

Include this page in an interactive notebook or use as an assessment.  


This huge bundle of resources was created in collaboration with  Teacher's Toolkit, The Fun Factory, and Practice Makes Perfect.  We put our over 80 years (gasp) of combined experience together to come up with activities that will engage, excite, and challenge your students.  Take a closer look in the video below!


 And try out a freebie from the assessment portion of the bundle!
click the picture to download this freebie from Google Drive!
Enter the rafflecopter below to win this fantastic megabundle of digraph delights. covering beginning, middle, and ending digraphs!

a Rafflecopter giveaway

Click here to visit my TpT store and purchase this bundle!

Tuesday, April 7, 2015

Classroom Management? There's an APP for that!

Hey ya'll! It's Kristen from Primary Pals! For Techy Tuesday, I thought it would be fun to incorporate tech tips with classroom management!

As we all know, classroom management can make or break a classroom. Many teachers find it extremely challenging. Management systems can be time consuming, whether it's modifying what you have or figuring out what incentives work best. Parent communication can also be time consuming whether you are writing e-mails, sending notes home, or even using sticker charts! What if I told you that there's an easier way to do all of this at once, just by a click of a button?

Meet, Class Dojothe behavior management system that has changed my life (as well as many other teacher's)!


Class Dojo is an online, interactive classroom management system where you can assign positive or negative points to a student. This can be used on your laptop, desktop, phone, or even tablet! It works especially well when transitioning because you can take your phone/tablet with you! 

I started using Class Dojo in January of this year. I had a class where the clip system didn't work for everyone, so I tried different management techniques to cater to the different types of kids in my classroom. Some things worked, some things didn't. So, I decided to try Class Dojo and it has worked with EVERYONE! 


Improved Behavior: I have seen a drastic improvement in behavior from my students. They LOVE earning points. I find that they are able to self motivate themselves, just by hearing the sound of a positive point being given to another student. The students off task are immediately focused. The points eventually turn into "Dojo Dollars". I created "Dojo Dollars" where each point is worth one dollar and they can later turn those dollars in during our Dojo Dollar Day. This is explained more later in the post :).

The program comes with a list of behaviors but the cool thing is that you can edit them and even add your own! We have added many in the classroom that relate to our day but the one that my students have come to love is the "star". The star is "working above and beyond" and although it counts as one point (just like the rest), I make it special and only give it to those who are working above and beyond. You should see how excited these kiddos get when they receive a star! It's amazing :).


**As you can see, there are many that I have added to work for our class

Focusing on the Positive: I RARELY give out red "negative" points. My kiddos know that if they hear the "negative" sound it must be something bad. They also know that these negative points aren't consequences, they are more of a "reminder" about behavior and what is expected. I focus on giving positive more because I believe that students react better to positive feedback, rather than criticism. 

Parent Communication: Parents are able to see their child's points daily. This is beneficial because then they are able to discuss with their children the points during the day. You can also message and communicate with your parents through Class Dojo. It's super easy to use and parents love it! 

Student Interest: Let's face it, they love it! They love the sound a positive point makes, they love the avatars, and they love seeing their points increase throughout the day or even the week!  Each time they receive a positive point, there's a high-pitched "ding" and whenever a negative point is given there is a lower-pitched "unfavorable" noise. 

I think it's also fun to allow the students to take ownership and really feel as if they are a part of the process. We vote on classroom behaviors, and with a Dojo purchase, kids can even change their avatars!

Student Responsibility: Class Dojo really does a great job of giving students the opportunity to "self check", by knowing if they're receiving points or not. They are able to check themselves, rather than me having to do it for them. Just hearing the noise of one student who is on task really brings it to their attention that they should be doing that as well. 

Goal Setting/Reflection: I have seen a huge improvement in my kid's awareness of their behavior since we started Class Dojo. They want to earn points and they really pay attention to the increase. 
I love seeing my kids wanting to set higher goals the next week.

*You can reset the points anytime you'd like. We do them on a weekly basis but I also keep track of the total points. 

*You can also set up your Dojo to show negative points or to not show them (even though you can access them). I created a "fake" class and used letters instead of names but here's an example:


Easy to Use: I love the Class Dojo App! It's so easy to just pull out my phone and give a point or even message a parent. Here's a sample screenshot from my iPhone. Notice that it tells you the percentage of positive, you can comment, or even message a parent! 


You can even make multiple classes for those of you who get different students throughout the day. 


YES!!


The great thing about Class Dojo is that you can use it any way you'd like and incorporate it into your own system! I'm going to share with you about how we use Class Dojo in our classroom! 

Prior to using Class Dojo, we had a clip chart where students earned tickets and class passes. They loved this! But it wasn't working AS well as I wanted it to. Something was missing. It was a lot to write down my students daily "colors" and I had students who needed a "note" home every day on where they ended their day and what happened during the day. This was TIME consuming and difficult when you have a million other things going on! 

So, once I switched over to Class Dojo I was able to use the incentives that we LOVE.

Goal Setting: On Monday morning, the students take out their "Dojo Record Sheets" and write down their points from the week before (I pull it up on our Brightlink Projector). They then set a goal for the week. If they passed their goal the prior week, they get to pick a class pass. They LOVE the class passes. 


Dojo Dollars: At the end of the week, we do "Dojo Dollar Day" where I pay them in "Dojo Dollars" that I created. Each point is worth $1. They are able to purchase something from our Dojo Reward Chart (below) or they can save up. I make some REALLY fun and exciting incentives that are worth a lot of points to teach them how to save. The kiddos even helped come up with some of the ideas to put on the reward chart. They all want to save up for lunch with me! All I need to do is just save up to buy them all lunch! ;) 


Club Dojo: Of course, the goals continue with the TOTAL points they receive. When they move up to a different point level (100, 200, 300, 400....) they can pull from the treasure box drawer that goes with that label. This helps keep them motivated to reach goals and they don't forget to remind me that they've made it to the next "club level" so I can move their name over. 


Thanks for checking out Techy Tuesday! As a special thank you, I decided to put my tracker charts up for free! If you are interested in these charts, you can grab it here

Make sure to follow me at Primary Pals or through Bloglovin! I plan on putting many of these products into a pack that you can purchase along with some freebies!
Thanks again and please comment if you have any questions! I will be happy to help you to the best of my ability! Also, if you Dojo, I would love to hear from you as well! 

Thanks for checking out iTeachFirst, don't forgot to follow us to see other amazing posts from some amazing first grade teachers! 


Monday, April 6, 2015

Grassheads! (with Amanda from First Grade Garden)

Hi there! My name is Amanda and you can usually find me over at the blog First Grade Garden. I'm here today to share with you a fun spring, science project to make with your kiddos. 

But first, let me tell you a bit about myself! I live in Manitoba, Canada with my husband, my baby girl (who just turned 1 on March 31st.... waaaah!), my two labs, and my two cats. We live out in the country on 4.5 acres and are building a new house on our property this summer! 


I have been teaching for 8 years. I have substitute taught every grade from K-9, taught Grade 6, Grade 3/4, Grade 4, and Grade 1. The last four years have been in first grade and that's where I plan to stay! I am also going back to university starting this spring to get my Post-Baccalaureate Diploma in Education. The first course I am taking is about problem solving in early years mathematics! 

I am currently on an extended maternity leave, but I go back to school in September. It was so nice to be able to spend a whole year at home with my baby girl, but I do miss the classroom. That's why the blogging world is so important to me--it keeps me connected with what is going on in other people's classrooms. :)

Ok, now onto my spring, science project. Spring is the perfect time to try a growing project in your classroom. We learn about living things in our science curriculum, so actually growing something is such a fun, hands-on activity for students to learn about how to care for a living thing and the needs of living things. I have grown different things different years, but the grassheads were definitely the most popular with my kiddos.


Materials Needed:
*beige panty hose (1 pair per two students)
*grass seed (about 1 tsp. per student)
*soil (about 1 to 1-1/2 cups per student)
*styrofoam or paper cups
*googly eyes
*elastic bands
*pipe cleaners
*markers
*water

Cut the feet off the panty hose (at about the knee). Place a teaspoon of grass seed into the panty hose (so it's in the "toe"). Scoop about a cup or two into the panty hose as well. Tie a knot in the panty hose to keep the soil from falling out. Form into a ball shape. The knot will go at the bottom. 

On the side of the "face", take a small clump of dirt and panty hose and wrap an elastic band around it to create a nose. Noses can be all sorts of shapes and sizes! Then hot glue googly eyes and a pipe cleaner mouth to the face. 

Have students decorate the cup as a "body". You could be super creative and use paper scraps and stickers. We just used good old fashioned markers. Fill the cup about 2/3 full with water. Sit the grasshead on the cup with the knotted end dangling in the water. Some water will soak up the knot and into the soil. 


Place the grassheads in a sunny spot and give them time to grow! I keep a few spray bottles of water near the grassheads and once a day I would let students spray them. It was usually while they were writing in their grasshead journals and I would pick the quietest table to go water their plants first. I also tell them how many squirts to give. It gets them practicing their counting and prevents over-watering. Win-win!


On the very last day of our plant unit I let the students take their grassheads home. But first, we pull out the scissors and I let my students become hairdressers! Tons of fun!


During the unit we keep track of our grassheads in these little journals. We write about how to make a grasshead, what our grassheads need (soil, water, air, and sun), and a daily journal of how our grass is growing. If you want to try out your own grassheads, you can download the journal for free from {here} or click the picture below!


I hope you give them a try! Growing something all by themselves is definitely a valuable lesson they won't forget. 

Thanks for stopping by! Come visit me over at First Grade Garden sometime. See you next time!


Sunday, April 5, 2015

Earth Day Poetry

Hello, everyone!  Happy Easter!  As you read this, I am probably either in North Carolina, enjoying Easter break with my son and his beautiful wife, or if it's Monday, I'm making that long 10-hour drive back home so I can be at work on Tuesday.  I hope you had a restful Easter break, and for those of you on spring break, I have only one thing to say.  JEALOUS!!


Since April is poetry month, and Earth Day also is coming up, I created a resource to combine the two!  Multitasking is a good thing, right?

Now, I must confess that I didn't really do much with poetry until last year.  I decided to create a lesson on syllables to go along with my Earth Day unit, and from there, I decided to have my first graders create a haiku about the Earth.  Pretty ambitious plan for first grade, wouldn't you say?

In case you don't know, or have forgotten, a haiku is a traditional Japanese poem made up of 17 syllables, written in a 5-7-5 format, so the first line is 5 syllables, the second line is 7 syllables, and the third line is 5 syllables.  I've read that modern haiku is moving away from that format of 5,7,5 as long as there are 17 syllables, but I chose to keep it because I wanted to integrate the concept of counting syllables in each line.  

I began with reminding the children what syllables were, and how now that we were becoming better readers, we would be challenged with longer words.  Longer words are made up of smaller parts called syllables, parts of words.  We practiced by clapping and counting the syllables in our names.  Then I gave them white boards, and posted one word at a time in my  pocket chart.  The children clapped and counted the syllables on their own, and I could quickly scan their answers to see if they were understanding the idea of syllables. I also had them insert the slash where they thought one syllable ended and the next began, but that wasn't the main focus of the lesson.  Mostly I was concerned with their ability to count the number of syllables.

garbage = 2 syllables
rainforest = 3 syllables

The next day, after a quick review of syllables, it was time to try to write a haiku about the Earth or Earth Day.

I wasn't sure if  they would be able to count syllables and create the haiku, so I started with having them write a rough draft on scrap paper.  Then they brought it back to me, and together we counted the out the syllables in each line, making sure it followed the 5-7-5 pattern. Once we had the haiku organized , I gave them the paper to write out their haiku in their best printing.


After that, I gave them the pieces to create their haiku craftivity.


click the image above to see the unit in my TpT store

The finished poems and craftivities came out really, really cute.  I was very pleased with their first attempts at writing poetry in the form of haiku.  I wish I would have thought to take pictures of their finished projects last year, but you can be sure I will this year!  

I also included an acrostic poem in this packet that you could use instead of the haiku.  If you would like to get a download of the acrostic poem page, you can click on the picture below.
click the picture above to download your acrostic poem template.