Showing posts with label Earth Day. Show all posts

Monday, April 20, 2015

Science Fun and Flower Rings

Hi There,
I'm Sarah Tharpe Winchell from Teaching Resources for the Classroom.  I am so excited to be part of this amazing group of people that care about teachers and children.

I love teaching science and integrate it as much as possible into our school day! Some days we have those great teachable moments that seem to be getting rarer during these assessment driven times.  This is one of those times! Here in North Carolina it has been raining quite a bit recently. As soon as the rain stops we head outside looking for any place we can play. Well of course rain makes puddles and as long as there are puddles.....kids will play in them! The bigger the rock, the harder the throw.......check out the picture. A nice little lesson about force.


Rain also help flowers to grow! One of our favorite things to do is to put these little buttercup flowers under our chins to see if we like butter.  I'm not sure how this all started. It is one of those passed down traditions.  The sunlight bounces off the little yellow flower onto the bottom of your chin and you see a yellow spot on your chin. No yellow....well you don't like butter! It doesn't work in the shade.  Since this is a Make-It Monday post I'm going to show you how to make a little yellow buttercup flower ring with your kids if you don't have any flowers. Then your children can see the sun reflect onto their chins. Get them to use their inquiry skills by testing the flower under different conditions such as classroom light, shade and bright sunlight. The children just love the magic of it all! It also makes a lovely Mother's Day present!!


You can find the pattern to make the flower ring here.  Flower Ring Pattern Print the pattern on the color of paper you want. I used yellow because I wanted buttercups. Each flower needs two flower pieces. Glue the flowers together with a glue stick. Use the hole punch to place the holes in the flowers. Closer is better. After the holes are punched, thread the ribbon through so it makes a loop on the back and then tie in the front. You can also make a bracelet using the same method just make the ribbon longer. I hope you do have buttercups but if you don't you can still have a sunny day and keep a folk legend going for a whole new group of children!

Cheers and sunshine,
Sarah from Teaching Resources for the Classroom

Sunday, April 5, 2015

Earth Day Poetry

Hello, everyone!  Happy Easter!  As you read this, I am probably either in North Carolina, enjoying Easter break with my son and his beautiful wife, or if it's Monday, I'm making that long 10-hour drive back home so I can be at work on Tuesday.  I hope you had a restful Easter break, and for those of you on spring break, I have only one thing to say.  JEALOUS!!


Since April is poetry month, and Earth Day also is coming up, I created a resource to combine the two!  Multitasking is a good thing, right?

Now, I must confess that I didn't really do much with poetry until last year.  I decided to create a lesson on syllables to go along with my Earth Day unit, and from there, I decided to have my first graders create a haiku about the Earth.  Pretty ambitious plan for first grade, wouldn't you say?

In case you don't know, or have forgotten, a haiku is a traditional Japanese poem made up of 17 syllables, written in a 5-7-5 format, so the first line is 5 syllables, the second line is 7 syllables, and the third line is 5 syllables.  I've read that modern haiku is moving away from that format of 5,7,5 as long as there are 17 syllables, but I chose to keep it because I wanted to integrate the concept of counting syllables in each line.  

I began with reminding the children what syllables were, and how now that we were becoming better readers, we would be challenged with longer words.  Longer words are made up of smaller parts called syllables, parts of words.  We practiced by clapping and counting the syllables in our names.  Then I gave them white boards, and posted one word at a time in my  pocket chart.  The children clapped and counted the syllables on their own, and I could quickly scan their answers to see if they were understanding the idea of syllables. I also had them insert the slash where they thought one syllable ended and the next began, but that wasn't the main focus of the lesson.  Mostly I was concerned with their ability to count the number of syllables.

garbage = 2 syllables
rainforest = 3 syllables

The next day, after a quick review of syllables, it was time to try to write a haiku about the Earth or Earth Day.

I wasn't sure if  they would be able to count syllables and create the haiku, so I started with having them write a rough draft on scrap paper.  Then they brought it back to me, and together we counted the out the syllables in each line, making sure it followed the 5-7-5 pattern. Once we had the haiku organized , I gave them the paper to write out their haiku in their best printing.


After that, I gave them the pieces to create their haiku craftivity.


click the image above to see the unit in my TpT store

The finished poems and craftivities came out really, really cute.  I was very pleased with their first attempts at writing poetry in the form of haiku.  I wish I would have thought to take pictures of their finished projects last year, but you can be sure I will this year!  

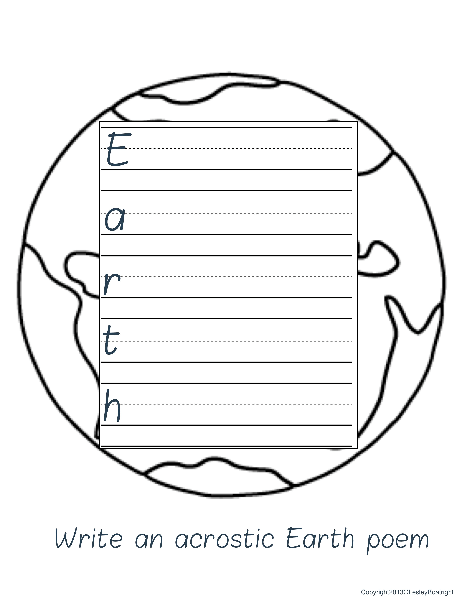
I also included an acrostic poem in this packet that you could use instead of the haiku.  If you would like to get a download of the acrostic poem page, you can click on the picture below.
click the picture above to download your acrostic poem template.